Tonight, I got a bug up my bum about staring on soldering some of my wires to the PCB board. First, I had to tear apart one of my 360 controllers (the wired one). That was hard enough, as I kept thinking that I was tearing apart $30. I grit my teeth and got through it though.
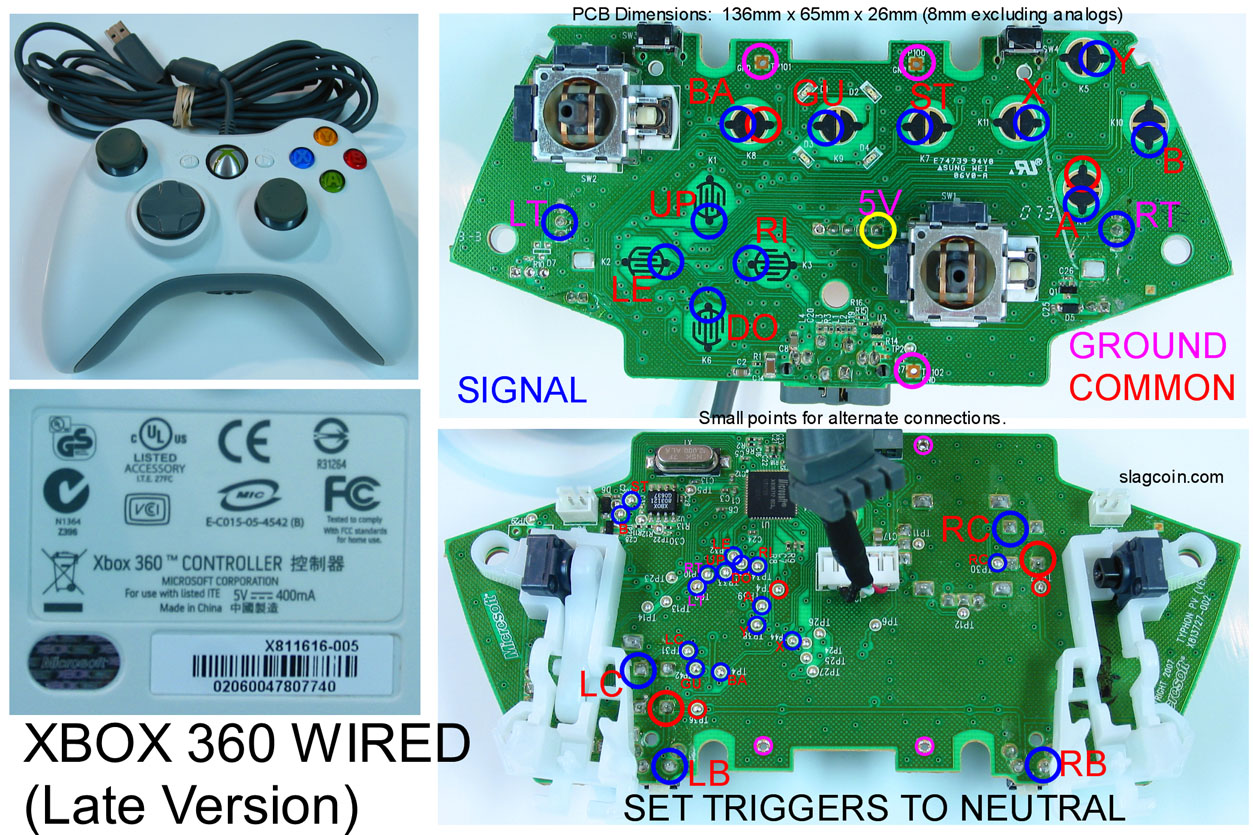
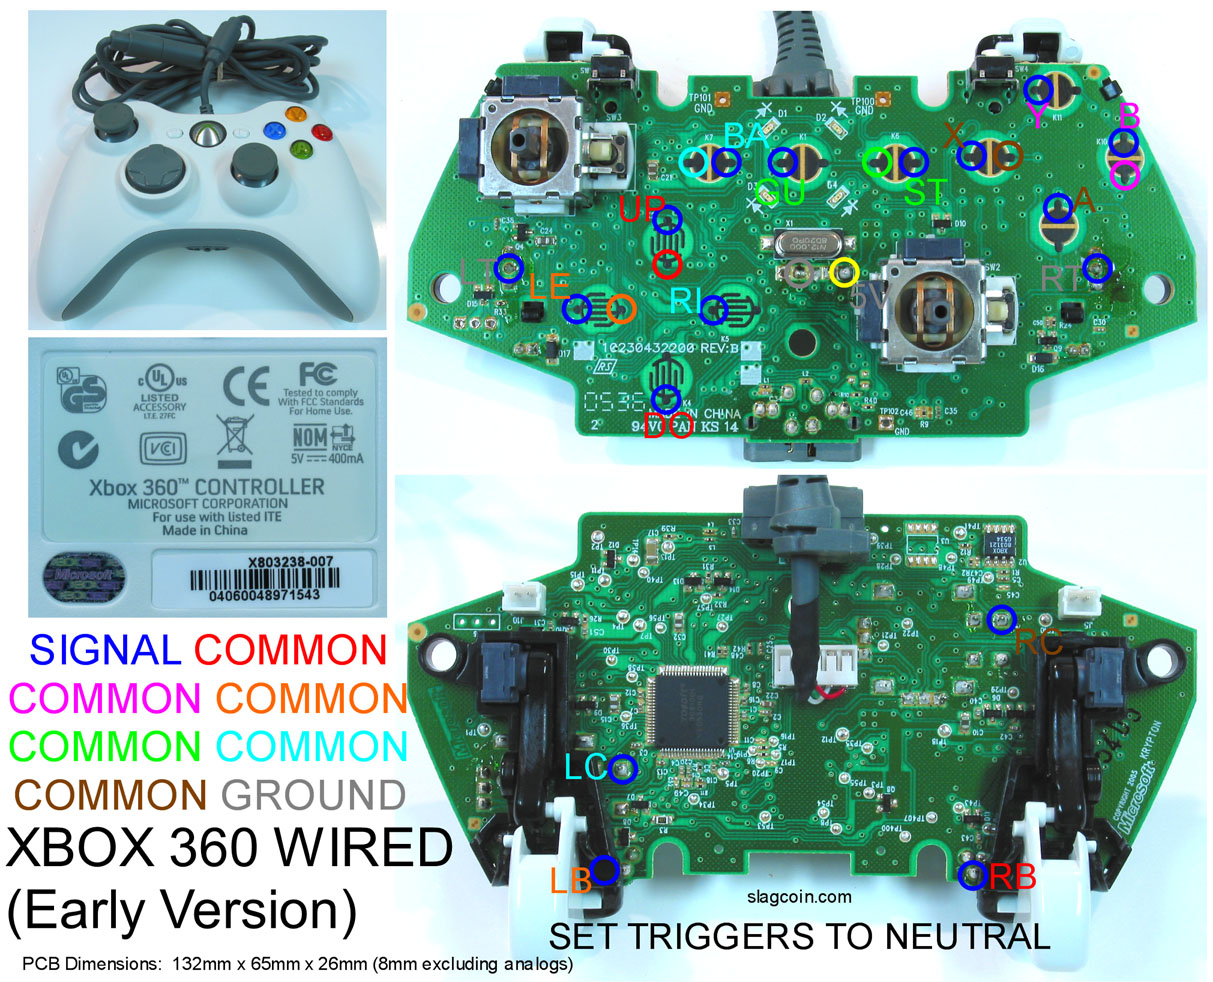
After that was done, I used a dremel to file away this black, rubberish coating that's on most of the contact points for the buttons. This, was mistake #1. I ended up exposing copper from nearby circuits and in some places ground away most of the copper at the points I needed to solder to. I tried to press through and solder what I could, and I made it all the way to the final signal point on the digital direciton pad...the one where I'd filed away too much copper. The solder had nothing to stick to, so I flipped the board over to find the point on the back. At this point, I realized I'd been referring to the wrong controller type. Based on the sticker, which had a MIC logo, I thought I had a late version when in fact, I had an early version . The sticker on the back looked like a late version sticker, and the analog triggers used white plastic for the mounts and lever arms...but the PCB defintely looked more like the images of the early version, which meant I'd wired pretty much everything incorrectly.
Long story short, one $30 controller later and I'm back to square one. Or square 3, since I still have the hardware and the wires set up with quick connects.
One thing those images don't do justice is scale. These PCBs are really small. And the copper circuitry on them is really pretty thin. It's very easy to grind away too much with a dremel and leave yourselve with nothing to solder to. Next time, I'll be using an exacto blade to carefully expose the metal.
About Me

- CBruce
- An artist in the game industry with over 11 years of experience and numerous shipped titles.
No comments:
Post a Comment